A ready-made image for the Raspberry PI is available, this is extremely optimized, needs little CPU power, is energy-efficient and memory-efficient. We put a lot of work into the optimization of this image.
This image does not work on the RPI3B+ because the TinyCore-OS is not available for this board. I will prepare a separate image for the 3B+.
The main features of this
image are:
- All ready to use , it does not require any intervention by the user, turn it on and it works.
- NO keyboard, mouse and monitor is required (but may still be connected, of course)
- A "shutdown" of Rapis is not necessary . To turn off, simply unplug
the power supply
- The IP address gets the Raspi via DHCP from the Internet router. In the Internet router (Fritzbox, Speedport ...), this IP is then readable.
- saves your the SD card, it is only read and only rarely written (only with changes of the configuration), therefore a long life of the SD card is to be expected.
How to install this image:
1) In the DOWNLOAD area, download the image "Raspberry PI finished image".
2) burn this image to an SD card. The SD card should be at least 1GB and may have a maximum of 32GB. The speed of the SD card does not matter, because it is used only
during boot and has no influence on the current operation.
3) Insert the SD card into the Raspi
4) Connect the transceiver to the Raspi (eg via soundcard, USB, serial interface etc.). The procedure is the same as for all other digital modes and should be
well known.
5) Connect the Raspi to the home network with an Ethernet cable
6) Switch on the power supply of the Raspi
After about 2 minutes you can look in the Internet router for the assigned IP address.
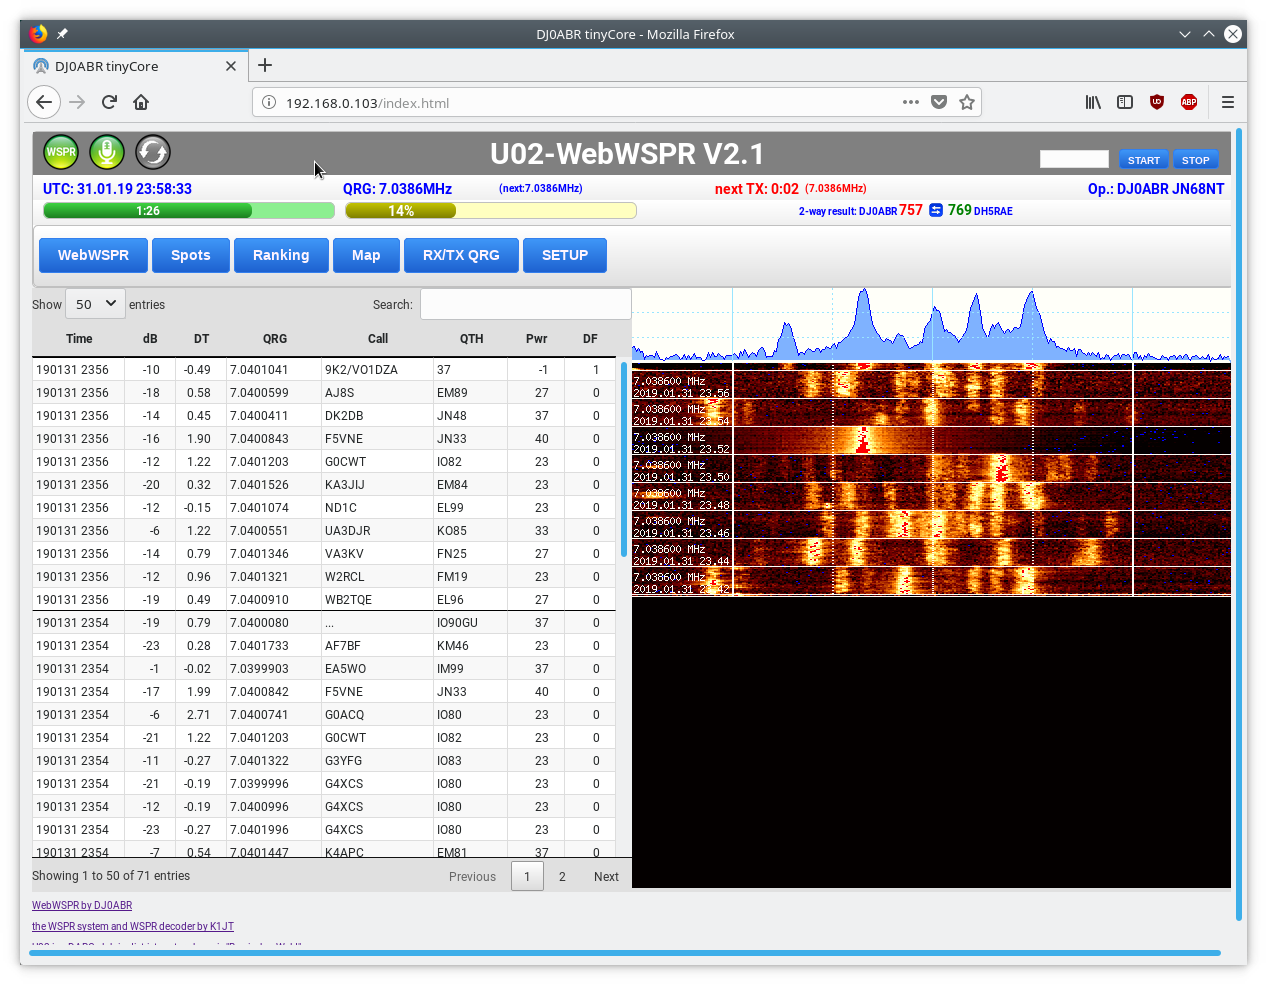
Now you open a browser (not on Raspi, because there is non, but on a device in the home network, PC, Tablet, etc ...) and
enter as web address the IP of the Raspi. The following window will appear:
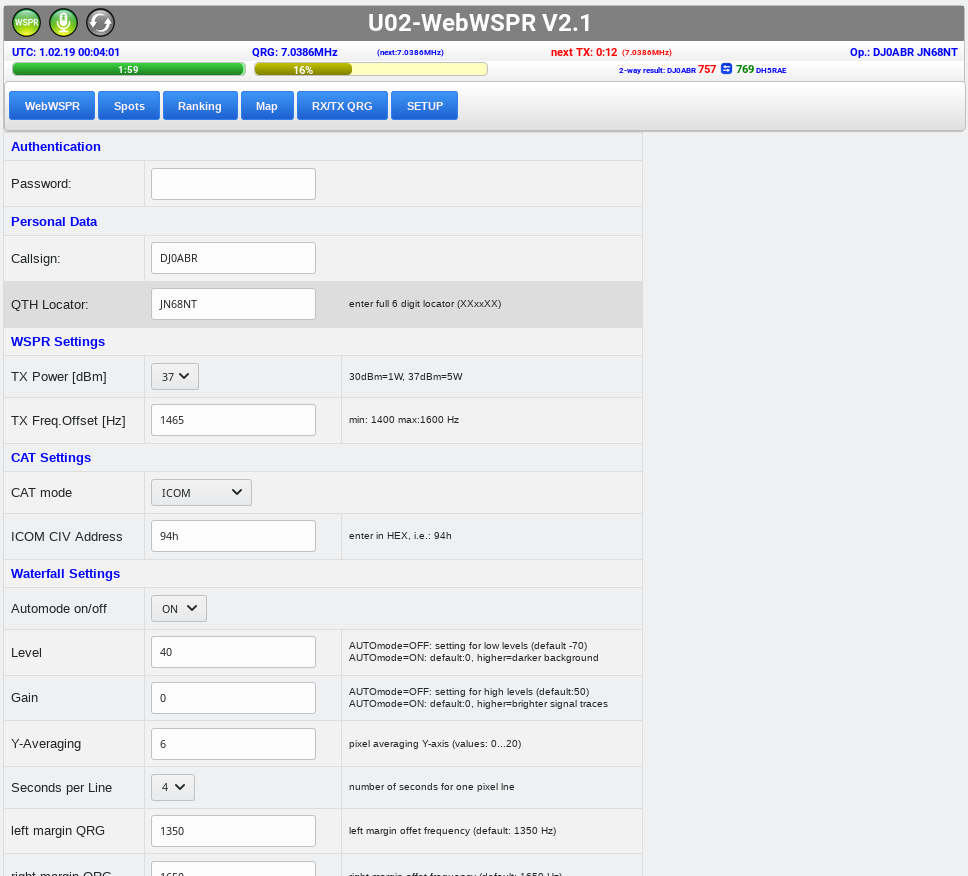
or at the very first start of this setup window:
the device is now in operation.
Setting of personal data:
- at the first start or later when clicking on the "SETUP" button, the setup window appears
- make your personal settings, as described on the page " OPERATION ".
Installation from the source code, for users with Linux experience:
the source code consists of 2 parts, both of which are in the ZIP archive:
1) the WSPR program, written in C for Linux (executable with almost all distibutions). This does the WSPR operation, the communication with the transceiver and is (once configured) standalone executable
2) the graphical user interface: this consists of various web pages, which are displayed by the Apache web server. The display can be made on any browser, on any device.
Unzip the source files:
I recommend unzipping in the folder: /home/user/wspr2
In principle, the folder does not matter, but if everyone uses the same, the maintenance may be easier
After unzipping you will find:
- ... /wspr2: the C source files and various scripts
- ... /wspr2/wsprd_xyz: the WSPR decoder of K1JT, version 2.0 (xyz ... version prepared for PC, ARM and ARM64bit)
- ... /wspr2/htdocs: subdirectory with the user interface web pages
Preparation of the Linux computer:
several libraries have to be installed. For the Raspberry PI the script raspi_prepare is provided. It loads and installs the required libraries with apt-get. For other devices (eg Odroid, PC, etc.) you can use this script as a starting point. In most cases, the library names differ only slightly. For example: libfftw3-dev or libfftw3-devel. You may have to make such adjustments yourself.
Compile the source code:
In the installation directory /home/user/wspr2 write: make
The program is now compiled. There must be no error messages. If the compilation process terminates, then a library may be is missing, the error message shows which. Install this library and then repeat: make.
As soon as this process has been completed without errors, the program can be started:
Starting the program:
Before starting, of course, a sound card and a transceiver should be connected. At least a sound card must be connected to the computer, as it is searched for at startup.
one-time, manual start:sudo ./wsprtk abc
See the program output in the consele, it give a detailled overview about the program flow.
First of all, all the files of the web pages are automatically copied into the Apache HTML (or htdocs) directory, all access rights are set and the sound card is searched.
The program is designed for operation with one sound card, if you have several, the search process might go wrong. The internal HDMI sound is ignored.
As soon as the program is running you start a browser somewhere in the network and enter the IP address of the Raspi (or similar). You will automatically be taken to the setup window where you have to enter your personal information, as described on the page " OPERATION ".
manual start in an endless loop:sudo ./startwspr
! At the beginning of this script is a command to change to the wspr2 directory. Here you have to customize the username!
If you start wspr with this script, you can use the ON / OFF buttons in the main window. Another advantage is that if the program should crash for some reason, it restarts itself.
automatic start:If you want to start WebWSPR automatically when booting, you can call startwspr in an appropriate place. The call must be made as root. This process work differently with every Linux distribution. HERE is a description for the Odroid. For the Raspi I recommend the above finished image, where the startup is already set up.